SYDE 263: Engineering prototyping
This term was the first time SYDE 263 - engineering prototyping was administered, so it was going to be a new experience for the students and instructors. This course was meant to give the practical hands on experience of design and circuits, given that SYDE 192L was online and the Arduino circuits were done using TinkerCAD.
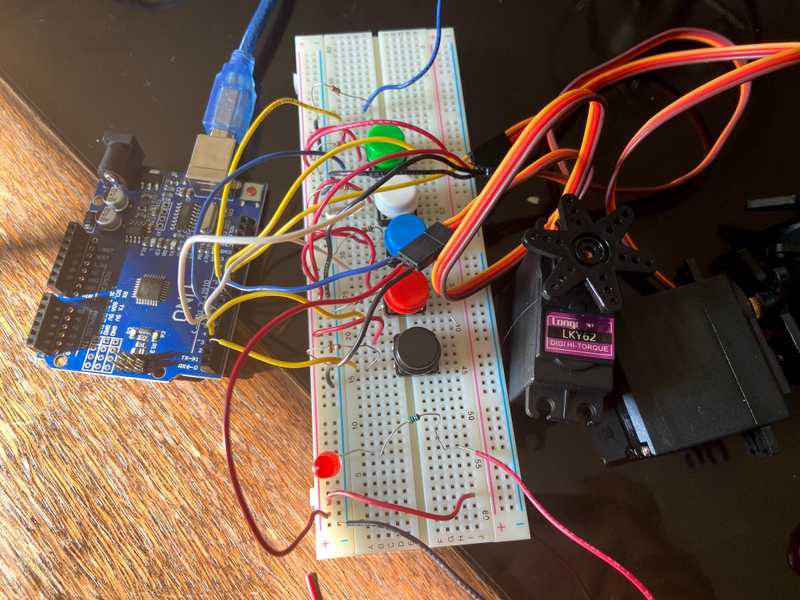
We all needed to purchase a lab kit which came with an Arduino UNO, resistors, LEDs, popsicle sticks, tools and more to provide all the materials for our final project. For our final project, we needed to use servo motors and arduino to move a golf ball from the ground to a pop can, called a "pick and place" mechanism. The other labs were incremental teaching us different skills that will help us with our final project, including learning how to control the servo motors using an arduino + push buttons, working with microcontrollers, and sensors.
It took a lot of iteration. But once you know what you're doing, it doesn't take too long to actually build out the project. I guess that's why it's called engineering prototyping :). There were a couple of things I needed to consider:
- How to arrange the 3 servo motors?
- How do I get the gripper to open and close using the servo motor?
- How do I attach the servo motors together? The motors are quite heavy and wouldn't be able to hold them together
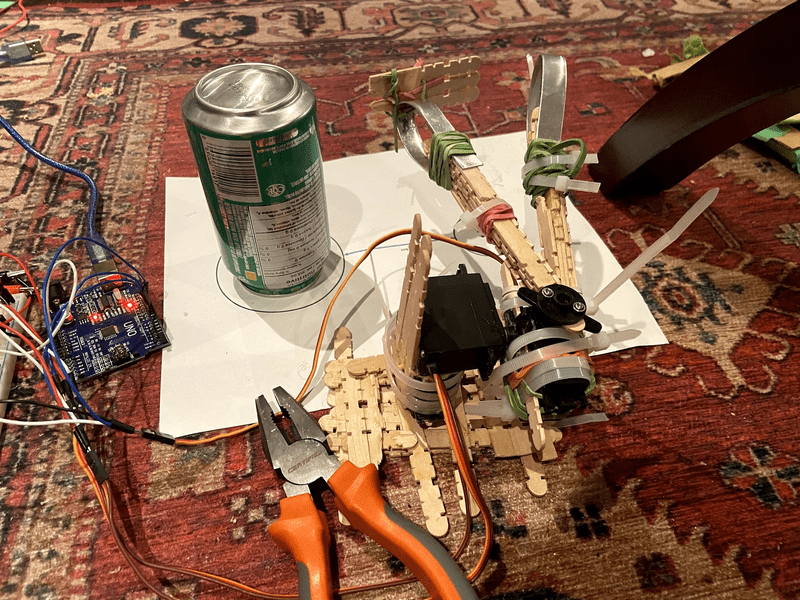
The gripper was the hardest part for me. I tried to use zip ties but zip ties I needed to get it working at the exact right angles, or else it wouldn't hold the golf ball. I originally had a claw like design that worked well with cardboard, but didn't translate well when modifying it to get it to work with popsicle sticks (since we weren't allowed to use cardboard for our final submission). I finally discovered these metal strips in the kit and bent them in a shape similar to the zip ties, and they ended up working well! It's all about recognizing the problems you have —> zip ties are too weak to keep the golf ball —> use metal strips since they are stronger and add a popsicle sticks to keep them in place. Breaking down the problems with your project step by step can allow you to iterate and have some quick fixes.
When trouble-shooting the circuit, I learned to look at all the connections step by step.
- Is the power supply working? We had an LED implemented in the circuit so that was an easy indicator to tell if the power supply was working based if it was lit up or not
- Are the servo motors working by themselves without being connected to the button? Just use some of the Arduino example code such as
sweepto see if the servo motor are connecting and functioning one by one - If the servo motors aren't working, then you've identified the main problem. Now check, is it the specific arduino port that's not working? Would it work if you switched the pin in the code?
- Otherwise, start tracing the wires line by line to see if they're connected in the wrong ports/not connected fully, unplug and replug, replace the wire if it's looking flimsy. Repeat across the breadboard and continue looking at all the wires you've connected to make sure they're all in the right places. I'd recommend trying to have a colour system for yourself so it's easy to separate the wires and know what they're used for.
It was honestly so satisfying seeing everything come together. Although the course was a pain at times the end result was worth it to see the robot finally do the task it was meant to do. Hopefully, it'll be more enjoyable in person. I think it the course could be quite intimidating for people who've never worked with tools or arduinos because there's definitely a learning curve in just getting used to the way to think about designing physical projects. It was definitely a lot more difficult to do online as it's pretty hard to troubleshoot just by showing your TA a video of your circuit. On that note, a huge shoutout goes to my TA Marco! He was so kind and patient and really appreciate all his time and effort helping myself and my classmates. I almost felt like going to the course hardware and mechanical design wasn't for me but he helped me become more confident in my skills. I might start using the Arduino to create other things of my own now!
Advice to anyone taking this course in the future
There are some prohibited materials they had that we're not allowed to use for the final project, including typical materials such as cardboard, tape, and hot glue. I convinced myself using these materials would be the easy way out of quickly getting through each steps of the lab to prototype the parts of the project. However come to the final design time, I realized given the design I had, I couldn't really do without cardboard and tape. Lesson learned that given a constraint, I should try to work towards the final product at the very beginning and make sure my initial design accommodates to the limited materials I have instead of optimizing for the easy wins of getting each small lab report approved but now having to start almost from scratch for the functional prototype. Zip ties are your friend!
When designing and building technical projects, get it right the full 100%. This was a pass or fail course, which actually means you get 100% or you fail. Some of us thought a pass or fail course meant that this would be easier than our other courses and would be less time consuming, but that was not the case. Some weeks I spent most of my time on 263. I remember the first lab we had to create these mechanisms using cardboard, and some of my mechanisms weren't working completely smoothly due to the quality of cardboard I had access to. I ended up rushing the first lab thinking that it would have been okay if not all the mechanisms were working 100% but ended up having to do it again which took a lot of time. Starting early and working on it during the week was much better since if I ran into any blockers I could reach out to the instructors or TAs for any help.
Some quick tips: learn to trouble shoot. Trace everything wire by wire and try to isolate the problem so you can tackle it step by step. Ask for help and validate any doubts you have early on. The wires given in the kit are pretty flimsy, they break easily and I had to continuously trim the wire for it to make a strong connection. I bought these Jumper Cable Wires online: https://www.amazon.ca/gp/product/B07FMZ12ZW/ref=ppx_yo_dt_b_asin_title_o03_s00?ie=UTF8&psc=1 and found them helpful, but most people managed without these.


